原文地址:https://lala.im/6781.html,請支持原作者!該處僅作轉載。
前段时间看到消息就申请了一个,没抱着开通的希望,等了一天没想到竟然开通了。。
既然开通了就折腾一哈,搭个梯子玩玩。。顺带测试一下我自己的NAT64+DNS64服务。
这小鸡只有ipv6,如果我们本地没有ipv6,要想顺利连上小鸡的v2ray,就必须套CloudFlare。此外小鸡上要想访问只有ipv4解析记录的网站就必须更改一个支持NAT64+DNS64的DNS服务。
首先把CloudFlare这边设置好,准备一个域名添加AAAA记录到你的小鸡上,注意勾选云朵图标:

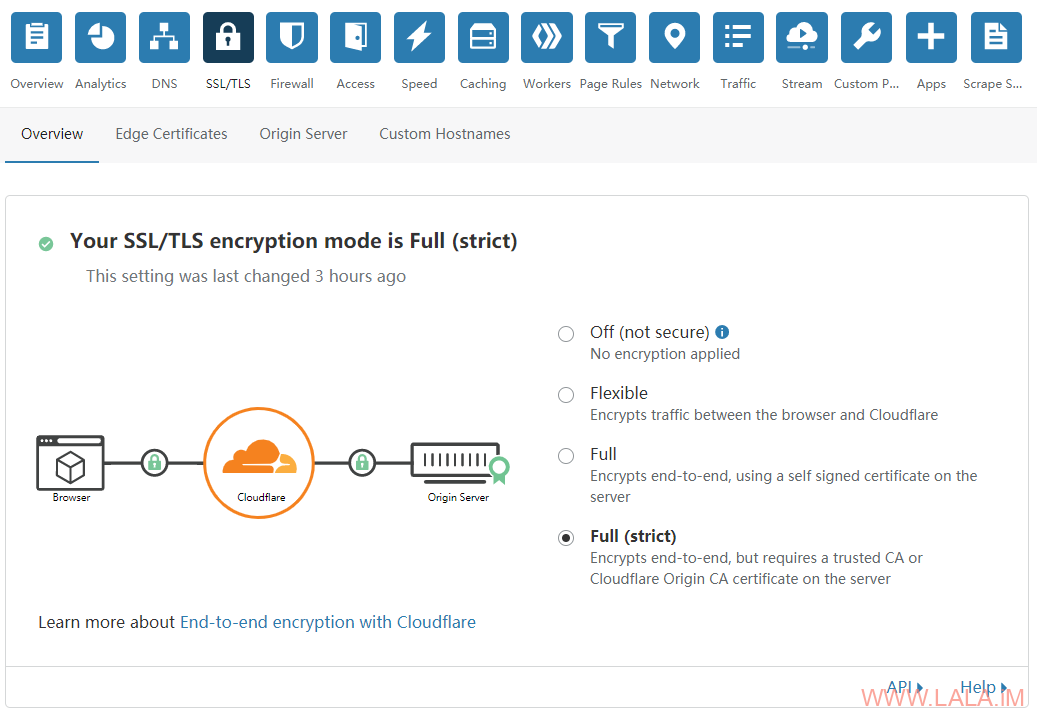
接着在SSL/TLS这里把模式选为Full (strict):

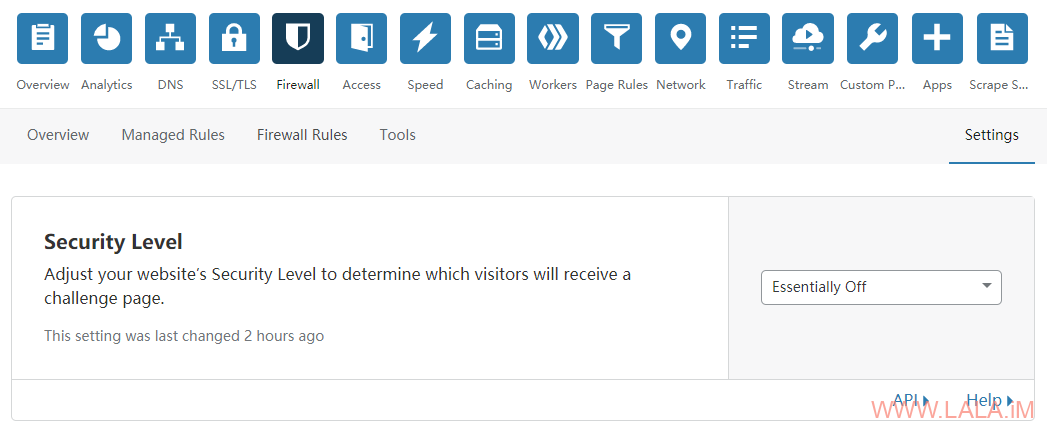
然后在Firewall-Settings,把Security Level改为Essentially Off:

这个Security Level选项默认其实就是Essentially Off,但有些人配置完发现死活连不上V2Ray的原因就是你之前设置了这个选项为其他值。
比如你的这个域名之前被CC攻击了,你把Security Level改为了Im Under Attack那么CloudFlare每次在访问你域名的时候会弹一个验证的网页用于抵御攻击,这个网页就阻挡了你的连接。
CloudFlare这边的配置就完成了,接下来登录到我们的小鸡内。
系统这边是Debian10,首先来安装nginx/certbot:
apt -y update
apt -y install nginx python-certbot-nginx
安装v2ray/清空默认的配置文件/生成一个uuid:
bash <(curl -L -s https://install.direct/go.sh)
echo > /etc/v2ray/config.json
cat /proc/sys/kernel/random/uuid
编辑配置文件:
nano /etc/v2ray/config.json写入如下配置:
{
  "log": {
    "loglevel": "info",
    "access": "/var/log/v2ray/access.log",
    "error": "/var/log/v2ray/error.log"
  },
  "inbounds": [
    {
      "port": 10000,
      "listen":"127.0.0.1",
      "protocol": "vmess",
      "settings": {
        "clients": [
          {
            "id": "你生成的UUID",
            "alterId": 64
          }
        ]
      },
      "streamSettings": {
        "network": "ws",
        "wsSettings": {
        "path": "/sometimesnaive"
        }
      }
    }
  ],
  "outbounds": [
    {
      "protocol": "freedom",
      "settings": {}
    }
  ]
}
检查v2ray配置是否有误:
/usr/bin/v2ray/v2ray -config /etc/v2ray/config.json -test没问题的话重启v2ray使新的配置生效:
systemctl restart v2ray接着新建nginx配置文件:
nano /etc/nginx/conf.d/v2ray.conf写入如下配置:
server {
    listen       [::]:80;
    listen       [::]:443 ssl;
    server_name  dns64.233.fi;

location /sometimesnaive {
    proxy_pass       http://127.0.0.1:10000;
    proxy_redirect             off;
    proxy_http_version         1.1;
    proxy_set_header Upgrade   $http_upgrade;
    proxy_set_header Connection "upgrade";
    proxy_set_header Host      $http_host;
    }
}
检查nginx配置是否有误:
nginx -t没问题的话使用certbot签发一个ssl证书:
certbot --nginx --agree-tos --no-eff-email --email [email protected]certbot是一个非常方便的ssl证书申请工具,可以自动为nginx配置证书/自动续期,按照下面的步骤选择即可:
Which names would you like to activate HTTPS for?
- - - - - - - - - - - - - - - - - - - - - - - - - - - - - - - - - - - - - - - -
1: dns64.233.fi
- - - - - - - - - - - - - - - - - - - - - - - - - - - - - - - - - - - - - - - -
Select the appropriate numbers separated by commas and/or spaces, or leave input
blank to select all options shown (Enter 'c' to cancel): 1
Cert not yet due for renewal

You have an existing certificate that has exactly the same domains or certificate name you requested and isn't close to expiry.
(ref: /etc/letsencrypt/renewal/dns64.233.fi.conf)

What would you like to do?
- - - - - - - - - - - - - - - - - - - - - - - - - - - - - - - - - - - - - - - -
1: Attempt to reinstall this existing certificate
2: Renew & replace the cert (limit ~5 per 7 days)
- - - - - - - - - - - - - - - - - - - - - - - - - - - - - - - - - - - - - - - -
Select the appropriate number [1-2] then [enter] (press 'c' to cancel): 1
Keeping the existing certificate
Deploying Certificate to VirtualHost /etc/nginx/conf.d/v2ray.conf

Please choose whether or not to redirect HTTP traffic to HTTPS, removing HTTP access.
- - - - - - - - - - - - - - - - - - - - - - - - - - - - - - - - - - - - - - - -
1: No redirect - Make no further changes to the webserver configuration.
2: Redirect - Make all requests redirect to secure HTTPS access. Choose this for
new sites, or if you're confident your site works on HTTPS. You can undo this
change by editing your web server's configuration.
- - - - - - - - - - - - - - - - - - - - - - - - - - - - - - - - - - - - - - - -
Select the appropriate number [1-2] then [enter] (press 'c' to cancel): 2
Traffic on port 80 already redirecting to ssl in /etc/nginx/conf.d/v2ray.conf

- - - - - - - - - - - - - - - - - - - - - - - - - - - - - - - - - - - - - - - -
Congratulations! You have successfully enabled https://dns64.233.fi
设置v2ray/nginx开机自启:
systemctl enable v2ray nginx最后修改机器的DNS服务器地址:
nano /etc/resolv.conf你得找一个支持NAT64+DNS64的DNS,这个是我用Linode搭建的:
nameserver 2600:3c01::f03c:92ff:fe60:7e3折腾的时候没有考虑到Euserv的机器在德国,我应该在Linode的德国开一台部署NAT64+DNS64的,这样梯子速度应该可以快不少。可惜这机器在Linode的佛里蒙特。。这样等于是环球旅行了一圈。。懒得骚扰别人客服了。。

